The Jam
- Tim Ellsworth
- Jul 3, 2017
- 3 min read
The Jam
1) How I discovered the jam:
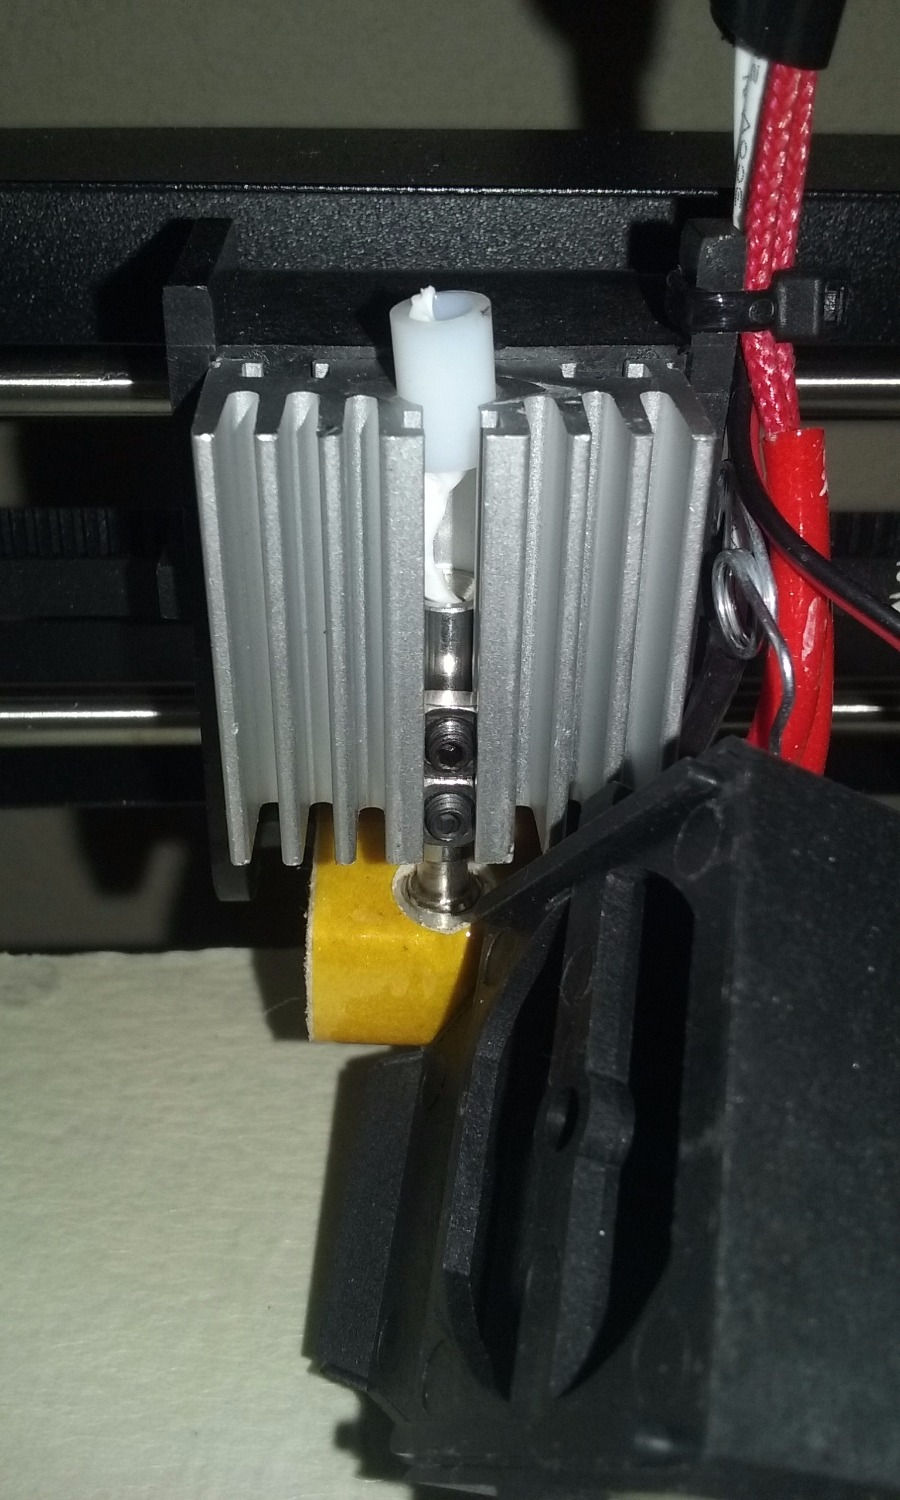
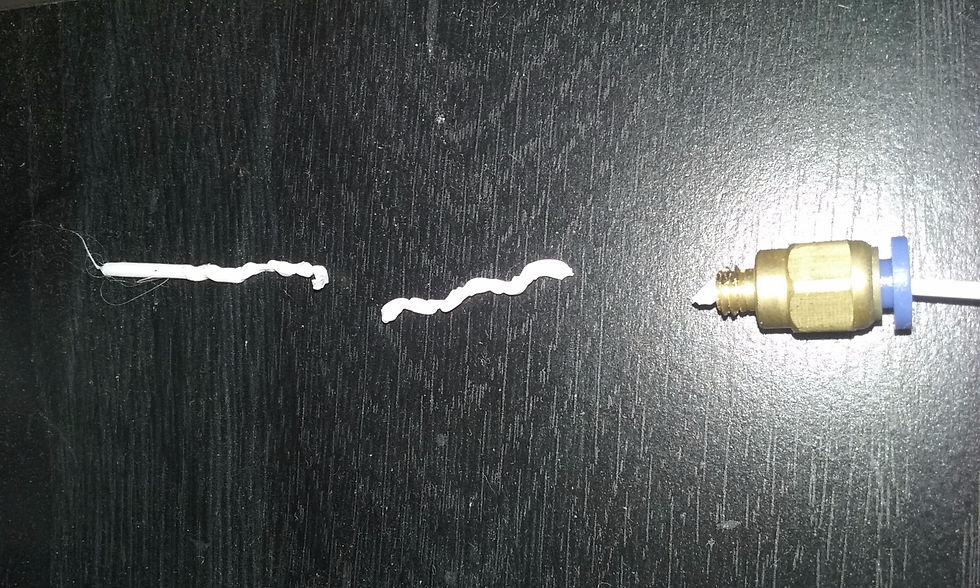
It was not immediately apparent that the issue I was having was a jam. The filament extruder wheel started clicking and the filament would slip back. I eventually pulled the filament out of the top of the extruder head, cut it and re-inserted it. There was not instruction in the provided manual about removing the filament or unjamming the extruder head so I really had no idea what I was doing. I eventually learned that although I had pulled the filament out of the top of the extruder head (which was difficult even when the head was hot) I had not actually removed the jam. I took the entire head apart and found that the filament had neatly coiled in the short plastic tube just below the brass fitting on top of the heat sink. I cleaned it all out and tried printing again but it jammed once again. The pictures below show what I found when I opened up the head. It is important to note that the extruder head needed to be pre-heated to remove the jam. I think it would be impossible otherwise.
2) Contacted Monoprice:
I had contacted Monoprice about the issue. They told me to check my fan settings to make sure that they were on 100% of the time. They already were. I checked my retraction settings which also seemed fine. I asked them why the short piece of PTFE tubing was plastic and not metal. They told me that it was "easier to replace".
3) On my own:
Based on the conversation that I had with Monoprice I decided that I was on my own now. I told them I was going to make my own modifications and they never responded to me. One thing that I wanted to make sure of was to not modify the printer head to a point where I couldn't go back.
4) The solution:
I didn't know exactly how I was going to make up the fitting coming into the extruder head but I knew that I needed to have a solid metal tube going all the way down to the hot end that more closely fit the diameter of the filament.
5) Finding the materials:
1/4" "All-thread" which I bought at a TSC Tractor Supply Center
1/4" "All-thread" coupler which I also got at TSC Tractor Supply Center
1/4" Nuts to put on the "All-thread" before cutting it (keeps the threads clean)
Oil for turning on the lathe
Acetone (to clean the part)
6) Tools:
Unfortunately my solution involves the use of a small lathe but I think that it might be possible to do this with a drill or drill press. I also looked into some other options which were discussed here on the 3D Hubs forum. I used a 5/64" size drill bit to bore out the "All-thread" and a center drill or just another larger drill bit to add a bit of a chamfer to the ends of the hole. To cut the length of "All-thread" I just used a hack saw and a vise to hold it.
5/64" Drill Bit
Center Drill
7" X 10" Metal Lather
Hack saw
Vise
Glass jar (for acetone cleaning)
7) Machining the "All-thread":
First I figured out that I needed about a 1 1/4" length of the "All-thread" to reach the hot end at the bottom of the heat sink while not having a gap between the brass fitting and the end of the "All-thread" inside of the coupler. I took my time boring it out. The steel is "gummy" and the drill bit is small. Lastly touch either ends of the hole with a center drill to add a chamfer and clean it up a bit.
Cut to length
Bore out the inner hole
Add a chamfer
8) Clean it:
I cleaned the part off with acetone in a glass jar to remove the oil from machining. I didn't want that oil getting on the filament. I dried off the acetone for a while before installing it.
9) Install:
After cleaning the part it was just a matter of installing it. I didn't tighten it very much at all. Just enough to keep it together.

10) Results:
Since I made this modification I have not had any jams. It looks a little awkward but it works!
